Upgrade to Flex Builder 3 Standard from US$99 (12,600円)
Upgrade to Flex Builder 3 Professional from US$299 (37,800円)
今って1ドル100円くらいだから、ドルで買った方が安くね?
Upgrade to Flex Builder 3 Professional from US$299 (37,800円)
今って1ドル100円くらいだから、ドルで買った方が安くね?
<?xml version="1.0" encoding="utf-8"?>
<mx:Panel xmlns:mx="http://www.adobe.com/2006/mxml"
 xmlns:logic="hoge.logic.*"
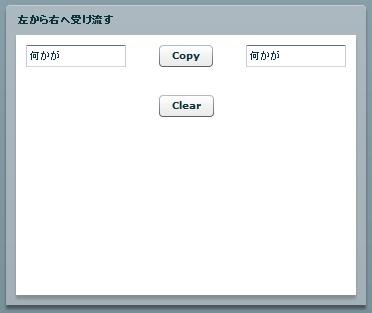
 width="360" height="300" layout="absolute" title="左から右へ受け流す">
 <mx:Script>
  <![CDATA[
  private function clickCopyButtonHandler(event:MouseEvent):void {
   rightField.text = leftField.text;
  }

  private function clickClearButtonHandler(event:MouseEvent):void {
   leftField.text = "";
   rightField.text = "";
  }
  ]]>
 </mx:Script>

 <mx:TextInput left="10" top="10" id="leftField" width="100"/>
 <mx:TextInput top="10" id="rightField" right="10" width="100"
  editable="false"/>
 <mx:Button y="10" label="Copy" id="copyButton" horizontalCenter="0"
  click="clickCopyButtonHandler(event)"/>
 <mx:Button y="60" label="Clear" horizontalCenter="0" id="clearButton"
  click="clickClearButtonHandler(event)"/>
</mx:Panel>
<?xml version="1.0" encoding="utf-8"?>
<mx:Panel xmlns:mx="http://www.adobe.com/2006/mxml"
 xmlns:logic="hoge.logic.*"
 width="360" height="300" layout="absolute" title="左から右へ受け流す">
 <logic:SimpleViewLogic id="logic"/>

 <mx:TextInput left="10" top="10" id="leftField" width="100"/>
 <mx:TextInput top="10" id="rightField" right="10" width="100"
  editable="false"/>
 <mx:Button y="10" label="Copy" id="copyButton" horizontalCenter="0"
  click="logic.clickCopyButtonHandler(event)"/>
 <mx:Button y="60" label="Clear" horizontalCenter="0" id="clearButton"
  click="logic.clickClearButtonHandler(event)"/>
</mx:Panel>
package hoge.logic {
 import hoge.view.SimpleView;

 import flash.events.MouseEvent;

 import mx.core.IMXMLObject;
 import mx.events.FlexEvent;

 public class SimpleViewLogic implements IMXMLObject {
  private var view:SimpleView;

  public function initialized(document:Object, id:String):void {
   view = document as SimpleView;
  }

  public function clickCopyButtonHandler(event:MouseEvent):void {
   view.rightField.text = view.leftField.text;
  }

  public function clickClearButtonHandler(event:MouseEvent):void {
   view.leftField.text = "";
   view.rightField.text = "";
  }
 }
}

URL を解析するには、通常は URLUtil クラスのメソッドを使用します。このクラスには、URL のサーバー名、ポート番号、およびプロトコルを検出するメソッドが用意されています。さらに、objectToString() メソッドを使用して、ActionScript オブジェクトをストリングに変換して URL の末尾に追加できます。また、URLUtil クラスのstringToObject() メソッドを使用して、クエリ文字列の任意の数の名前と値のペアをオブジェクトに変換できます。これによって、アプリケーションロジックでより簡単にフラグメントを操作できるようになります。URLUtilクラスのobjectToString()、stringToObjectメソッドがイイ感じ。
<filter>
    <filter-name>s2filter</filter-name>
    <filter-class>org.seasar.framework.container.filter.S2ContainerFilter</filter-class>
</filter>
<filter-mapping>
    <filter-name>s2filter</filter-name>
    <url-pattern>/*</url-pattern>
</filter-mapping>
-context-root /blazeds -services=C:\blazeds\WEB-INF\flex\services-config.xml
-load-config+=C:\blazeds\WEB-INF\flex\flex-config-ext.xml
<flex-config>
    <compiler>
        <context-root>/blazeds</context-root>
        <services>services-config.xml</services>
    </compiler>

    <metadata>
    <title>blazeds with Seasar2</title>
        <description>blazeds with S2 application</description>
        <publisher>infy2c</publisher>
        <creator>infy2c</creator>
        <language>JA</language>
    </metadata>
</flex-config>
<factories>
  <factory id="s2" class="org.seasar.flex2.rpc.remoting.service.fds2.factory.Seasar2Factory" />
</factories>
<destination id="hogeService">
  <properties>
    <factory>s2</factory>
  </properties>
</destination>
<?xml version="1.0" encoding="utf-8"?>
<cairngorm:ServiceLocator
  xmlns:mx="http://www.adobe.com/2006/mxml"
  xmlns:cairngorm="com.adobe.cairngorm.business.*">
  <mx:RemoteObject
    id="hogeService"
    destination="hogeService"
    result="event.token.resultHandler(event);"
    fault="event.token.faultHandler(event);">
  </mx:RemoteObject>
</cairngorm:ServiceLocator>
package hoge {
    import com.adobe.cairngorm.business.ServiceLocator;

    import mx.rpc.AbstractService;
    import mx.rpc.AsyncToken;
    import mx.rpc.IResponder;

    public class hogeDelegate {
        private var responder:IResponder;
        private var service:AbstractService;

        public function hogeDelegate(responder:IResponder) {
            this.service = ServiceLocator.getInstance().getService("hogeService");
            this.responder = responder;
        }

      public function hoge():void {
          var token:AsyncToken = service.hoge();
          token.resultHandler = responder.result;
          token.faultHandler = responder.fault;
      }
}